Get Started
Thanks for purchasing RealEstate
Please read the documentation carefully, and if you have any questions, please feel free to contact us. Most pages are accompanied by a video tutorial, it's recommended to check both, the video and the written Documentation.
Must Read this:
After purchase, it is suggested to setup the Web APIfirst for smooth functioning of the application.Web API is in PHP 7.0 and it will work on all hosting packages
iOS Configuration
In order to start configuration, you need to install Xcode.
Change App Name & Bundle ID

Change Color Scheme

Above illustration demonstrates the process to change the Colors of the application.
You can change your apps colors to create a custom look. The primary color is the color of the Toolbar, some buttons and headers. The primary dark color is used for e.g. the status bar. Get more color from here material.io
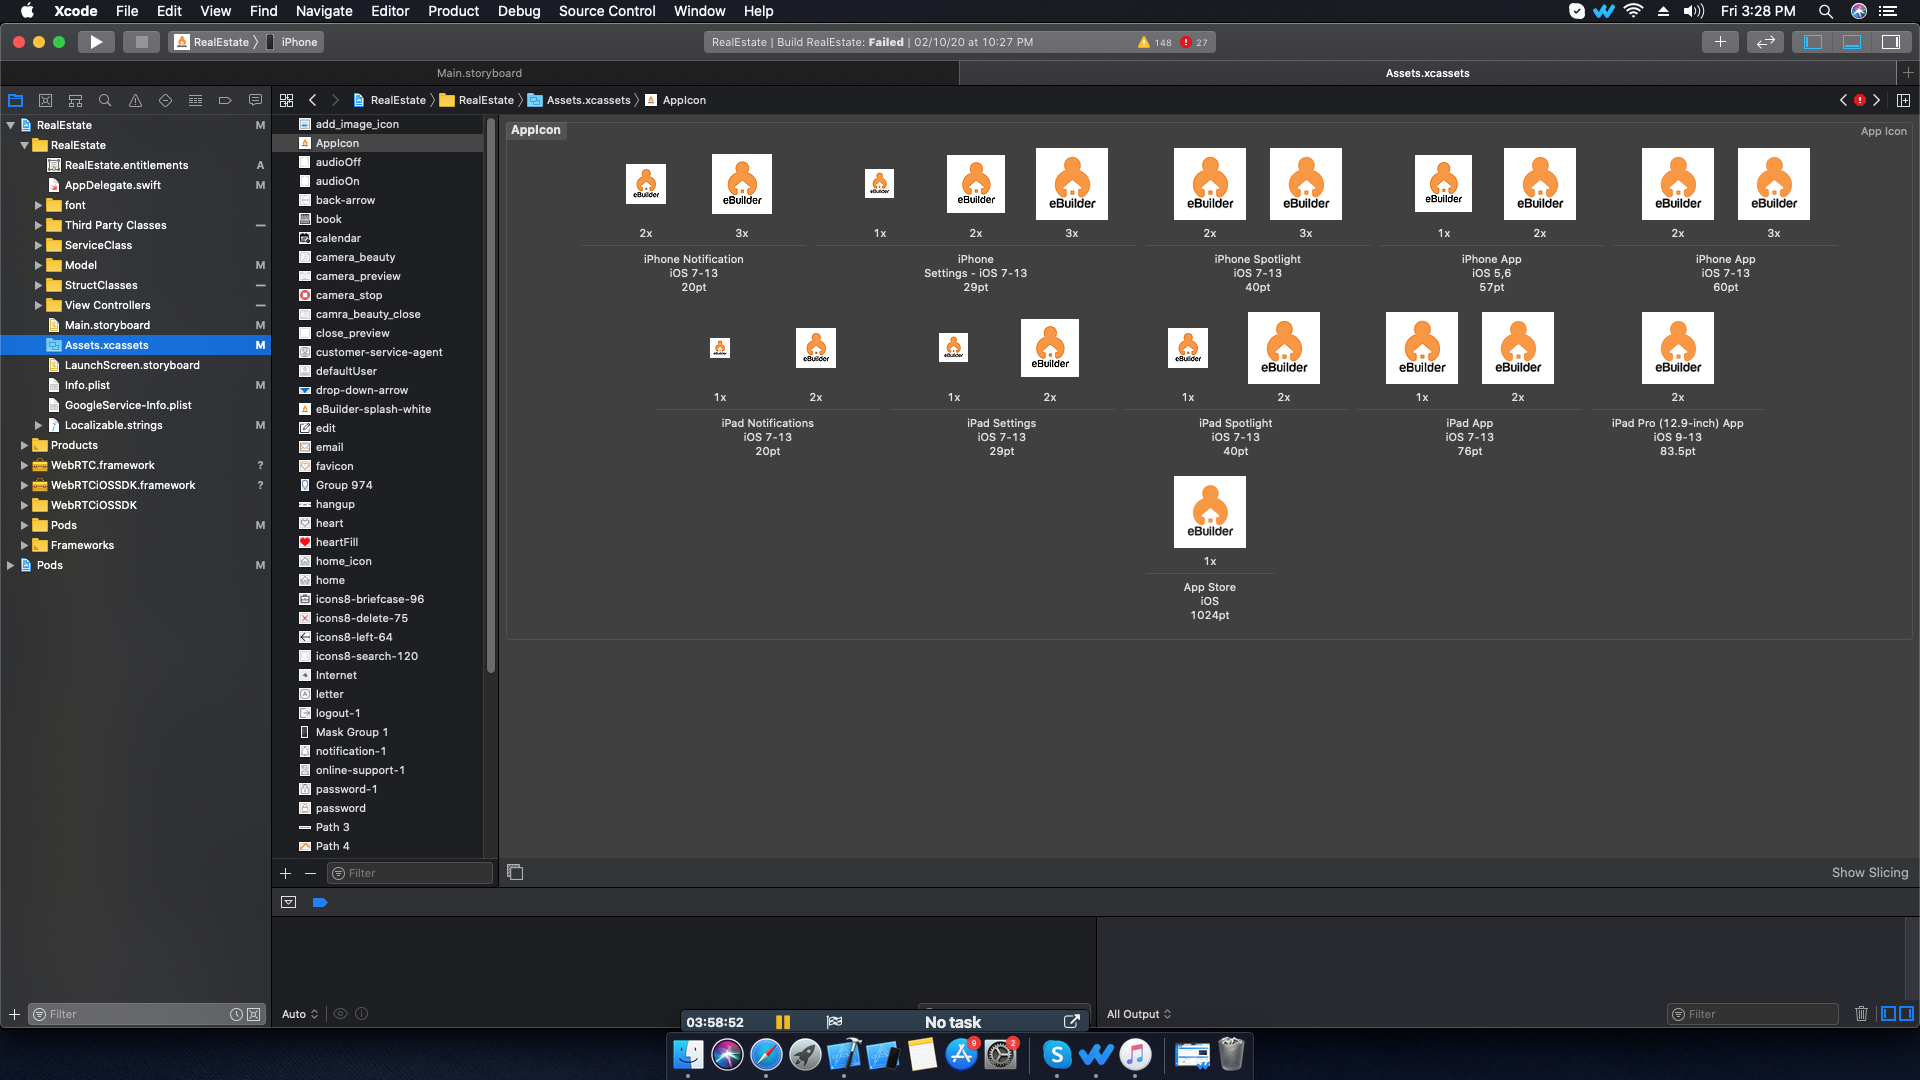
Change App icon
Now you need to put a png file
this URL will help you resize your images or event create new icon to your app Launcher Icon Generator
Change API Links

Above illustration demonstrates the process to change the Rest Api link of the application
Firebase Configuring
Prerequisites
Before you begin, you need a few things set up in your environment:
- Xcode 9.2 or later
- An Xcode project targeting IOS 10 or above
- Swift projects must use Swift 4.0 or later
- The bundle identifier of your app
- CocoaPods 1.5.0 or later
- For Cloud Messaging:
If you don't have an Xcode project already, you can download one of our quickstart samples if you just want to try a Firebase feature. If you're using a quickstart, remember to get the bundle identifier from the project settings, you'll need it for the next step.
Add Firebase to your app
It's time to add Firebase to your app. To do this you'll need a Firebase project and a Firebase configuration file for your app
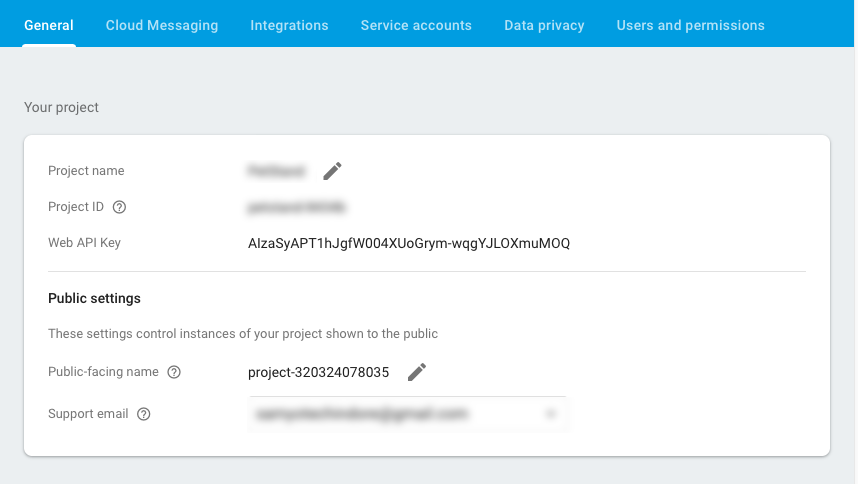
- Create a Firebase project in the Firebase console, if you don't already have one. Click Add project. If you already have an existing Google project associated with your mobile app, select it from the Project name drop down menu. Otherwise, enter a project name to create a new project.
- Optional: Edit your Project ID. Your project is given a unique ID automatically, and it's used in publicly visible Firebase features such as database URLs and your Firebase Hosting subdomain. You can change it now if you want to use a specific subdomain.
- Follow the remaining setup steps and click Create project (or Add Firebase if you're using an existing project) to begin provisioning resources for your project. This typically takes a few minutes. When the process completes, you'll be taken to the project overview
Now that you have a project, you can add your iOS app to it:
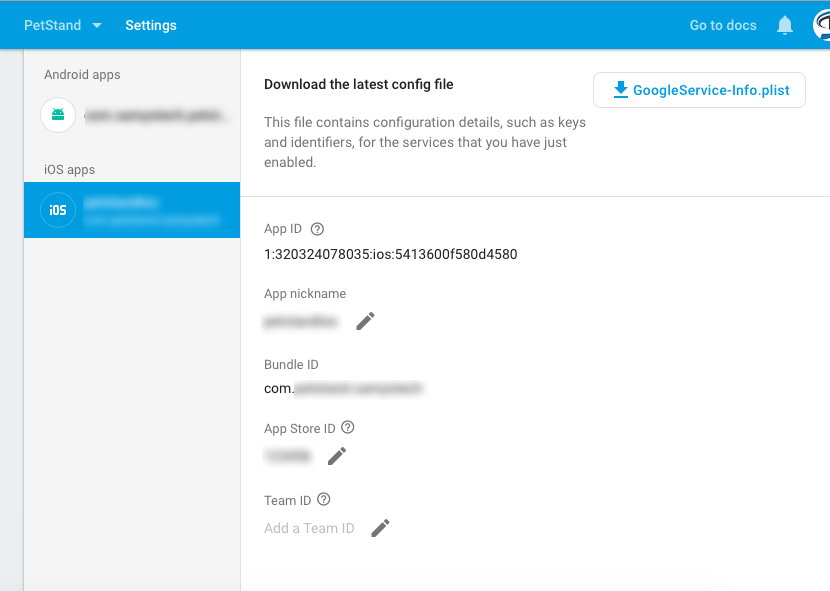
- Click Add Firebase to your iOS app and follow the setup steps. If you're importing an existing Google project, this may happen automatically and you can just download the config file.
- When prompted, enter your app's bundle ID. It's important to enter the bundle ID your app is using; this can only be set when you add an app to your Firebase project.
- During the process, you'll download a GoogleService-Info.plist file. You can download this file again at any time.
- After you add the initialization code, run your app to send verification to the Firebase console that you've successfully installed Firebase.
NOTE: If you have multiple build variants with different bundle IDs defined, each app must be added to your project in Firebase console.
Add the SDK
If you are setting up a new project, you need to install the SDK. You may have already completed this as part of creating a Firebase project.
We recommend using CocoaPods to install the libraries. You can install Cocoapods by following the installation instructions. If you'd rather not use CocoaPods, you can integrate the SDK frameworks directly without using CocoaPods.
If you are planning to download and run one of the quickstart samples, the Xcode project and Podfile are already present, but you'll still need to install the pods and download the GoogleService-Info.plist file. If you would like to integrate the Firebase libraries into one of your own projects, you will need to add the pods for the libraries that you want to use.
- If you don't have an Xcode project yet, create one now.
- Create a Podfile if you don't have one:
- $ cd your-project directory
- $ pod init
- Add the pods that you want to install. You can include a Pod in your Podfile like this:
pod 'Firebase/Core'
This will add the prerequisite libraries needed to get Firebase up and running in your iOS app, along with Google Analytics for Firebase. A list of currently available pods and subspecs is provided below. These are linked in feature specific setup guides as well. - Install the pods and open the .xcworkspace file to see the project in Xcode.
- $ pod install
- $ open your-project.xcworkspace
- Download a GoogleService-Info.plist file from Firebase console and include it in your app.
Initialize Firebase in your app
The final step is to add initialization code to your application. You may have already done this as part of adding Firebase to your app. If you are using a quickstart this has been done for you.
- Import the Firebase module in your UIApplicationDelegate:
- Configure a FirebaseApp shared instance, typically in your application's
application:didFinishLaunchingWithOptions: method:
In this App firebase is already integrated you can generate googleservice-info.plist on firebase console https://firebase.google.com/
After going to this given website follow these steps :
- Click on go to console
- sign in with your google account
- add project
- generate googleservice-info.plist
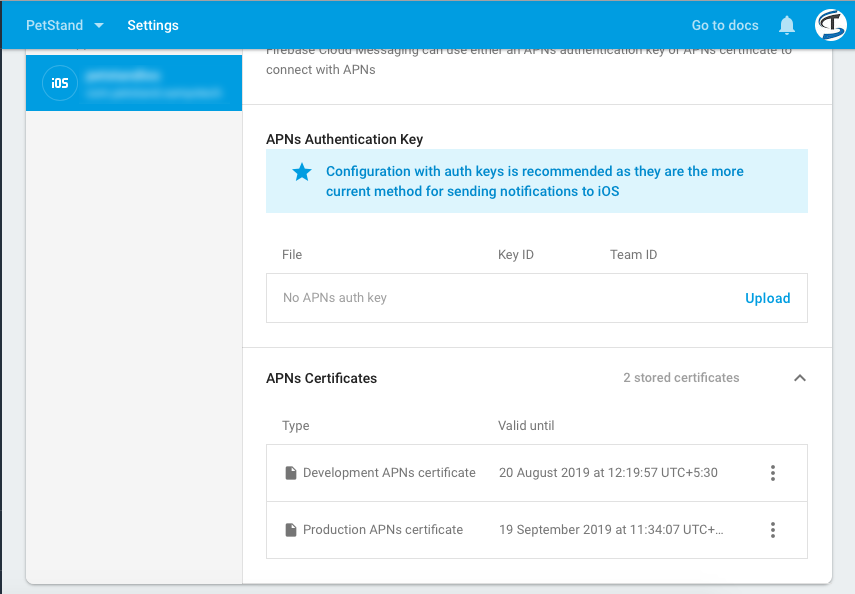
- Replace with given file in screeshot
You can Add here P12 file.
You can also view this refrence site https://medium.com/@ankushaggarwal/generate-apns-certificate-for-ios-push-notifications-85e4a917d522

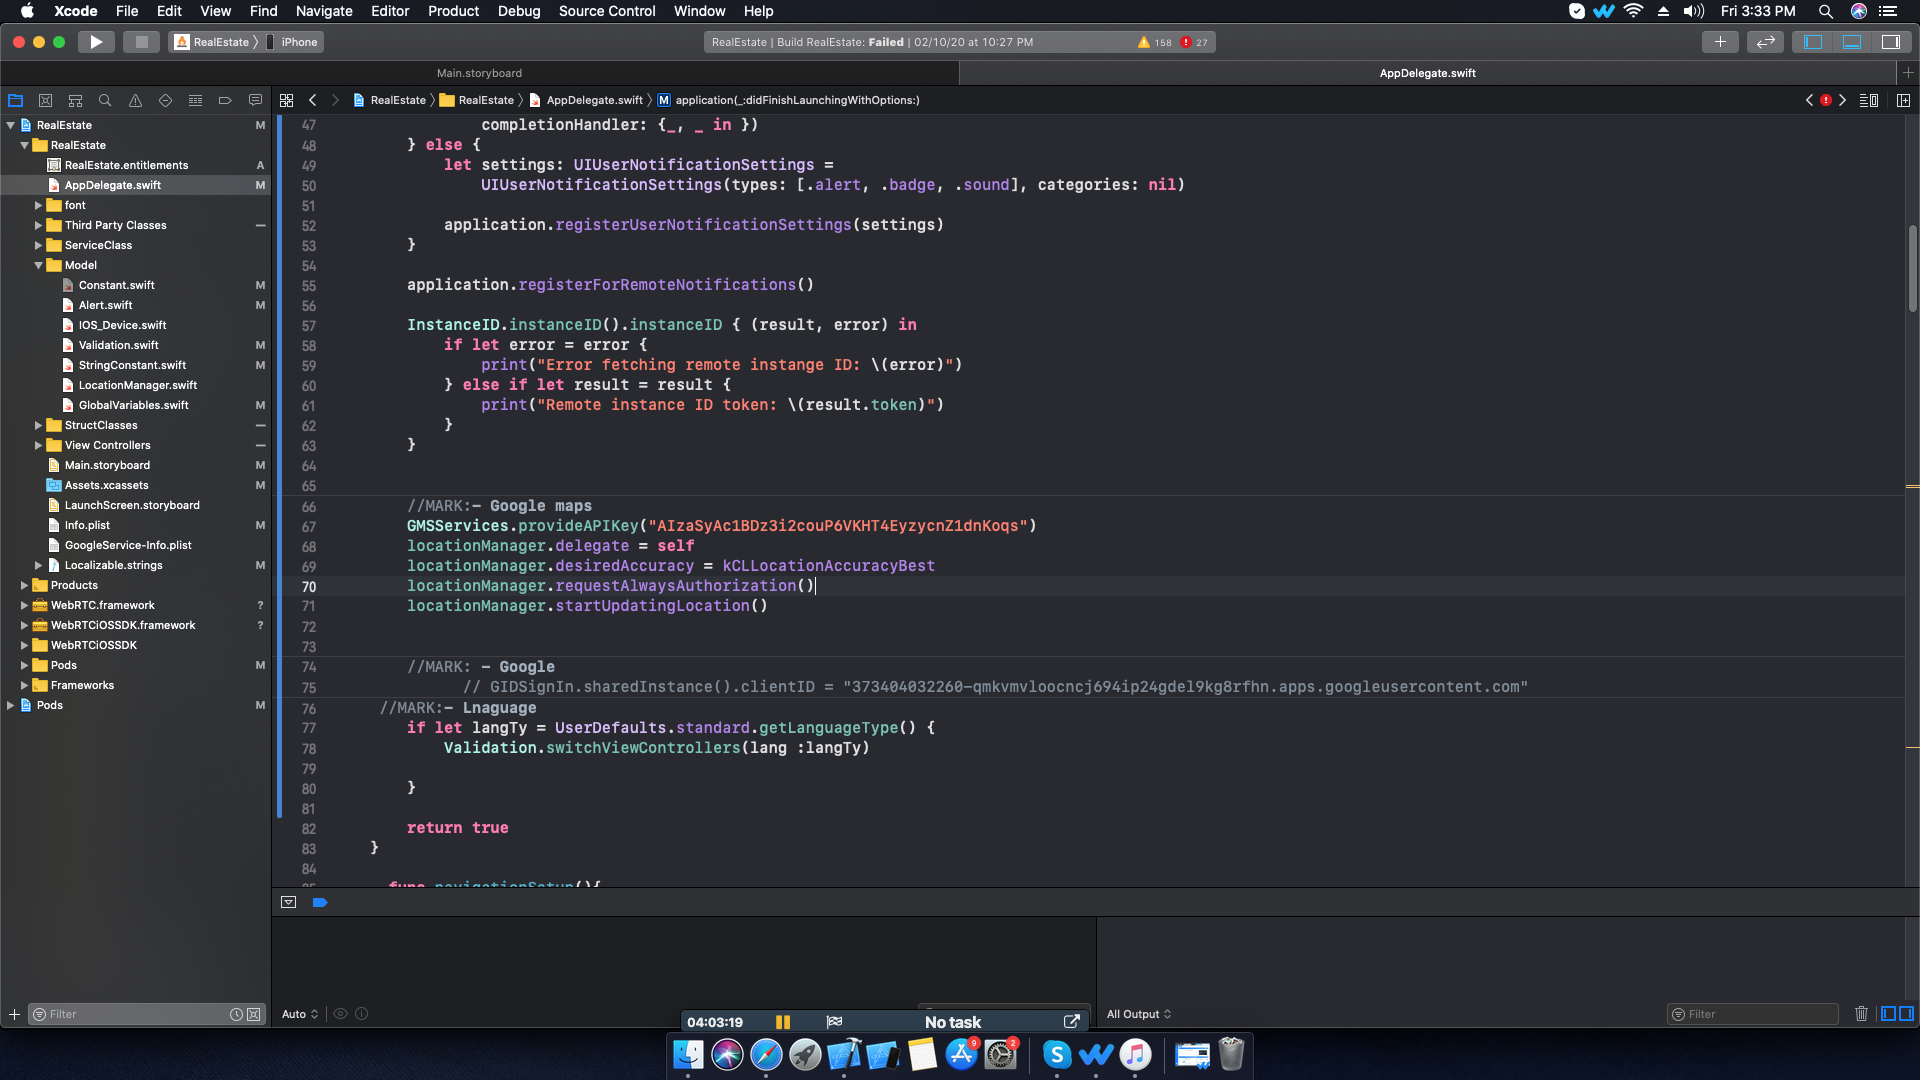
Google Map Configration
First you have to add Firebase account in your application/project and then only you will be able to see your project on Google API Console.
Web Configuration
Installing RealEstate in PHP
Before getting started, please make sure your web server meets all the below pre-requisites:
- PHP Version 7.0 + advance
- CURL Extension (enabled on most hosts by default)
- MySQL extension (enabled on most hosts by default)
Deploying the PHP Application on a Remote Web Server
Deploying the PHP Application on a Remote Web Server
Database Setup & Configuration
Database Installation
Extract the project_name.zip file on your local apache server.
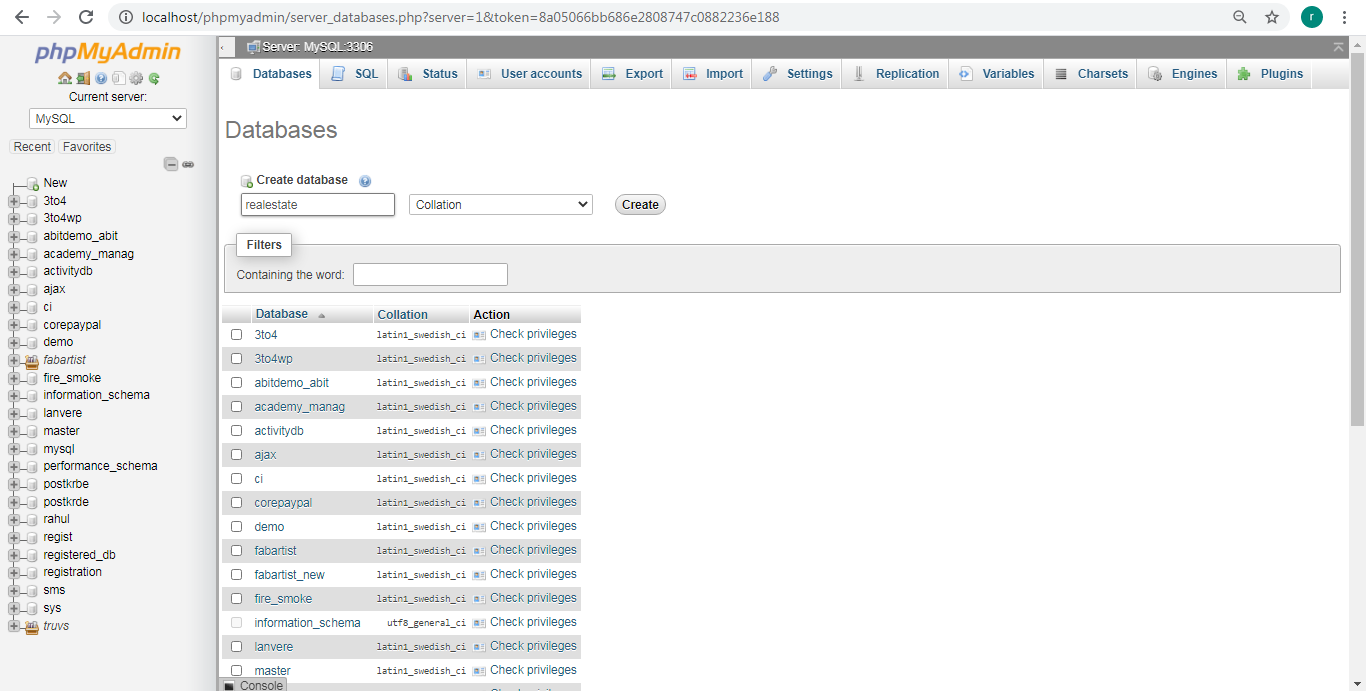
Create a new database on the phpmyadmin.
- Open the browser & type this url http://localhost/phpmyadmin/
- Click on New option to create new database.

- Enter your database name as below & click on create button.
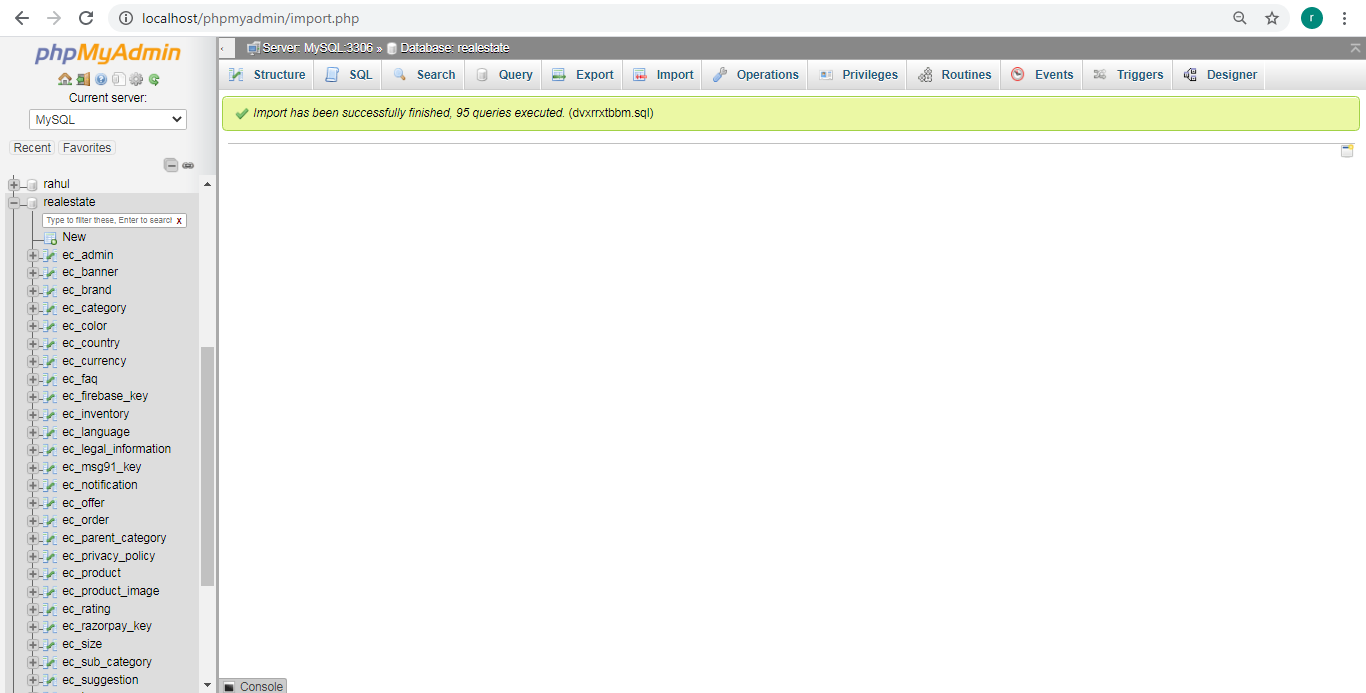
- Import sql file in your database by going into phpmyadmin
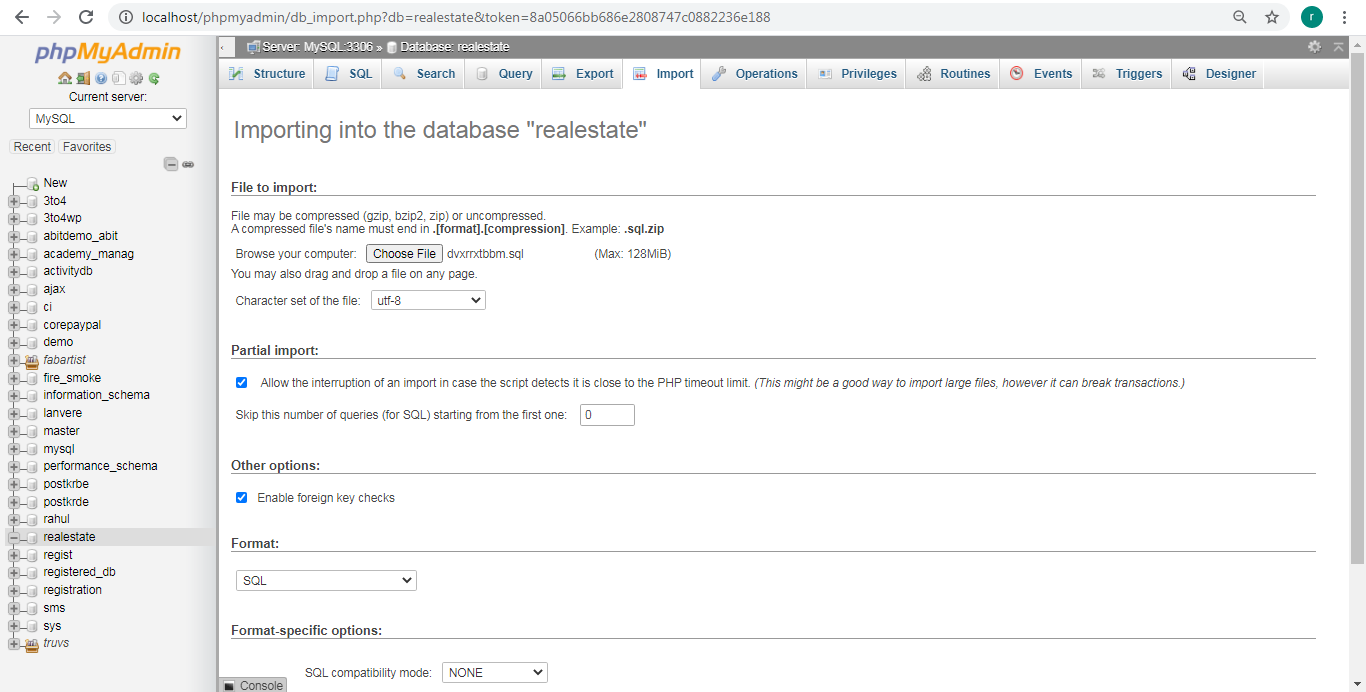
- Import sql file successfully!
Admin Panel Setup
Final configuration
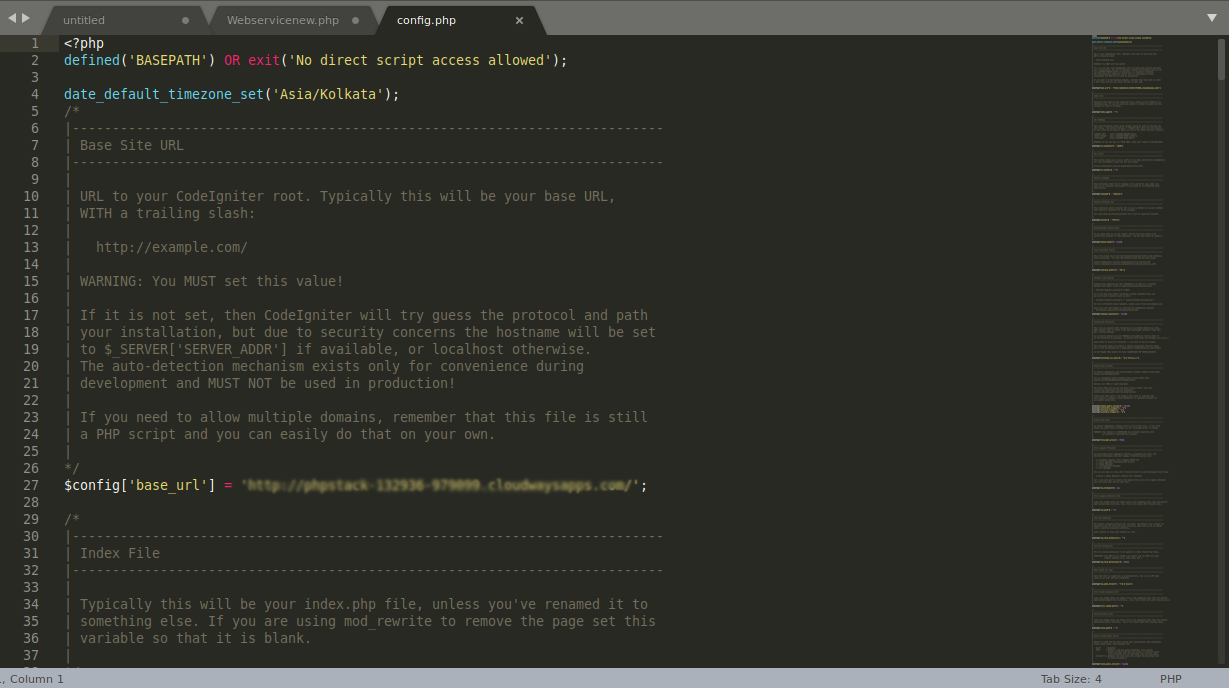
- • Change the base URL:- application/config/config.php
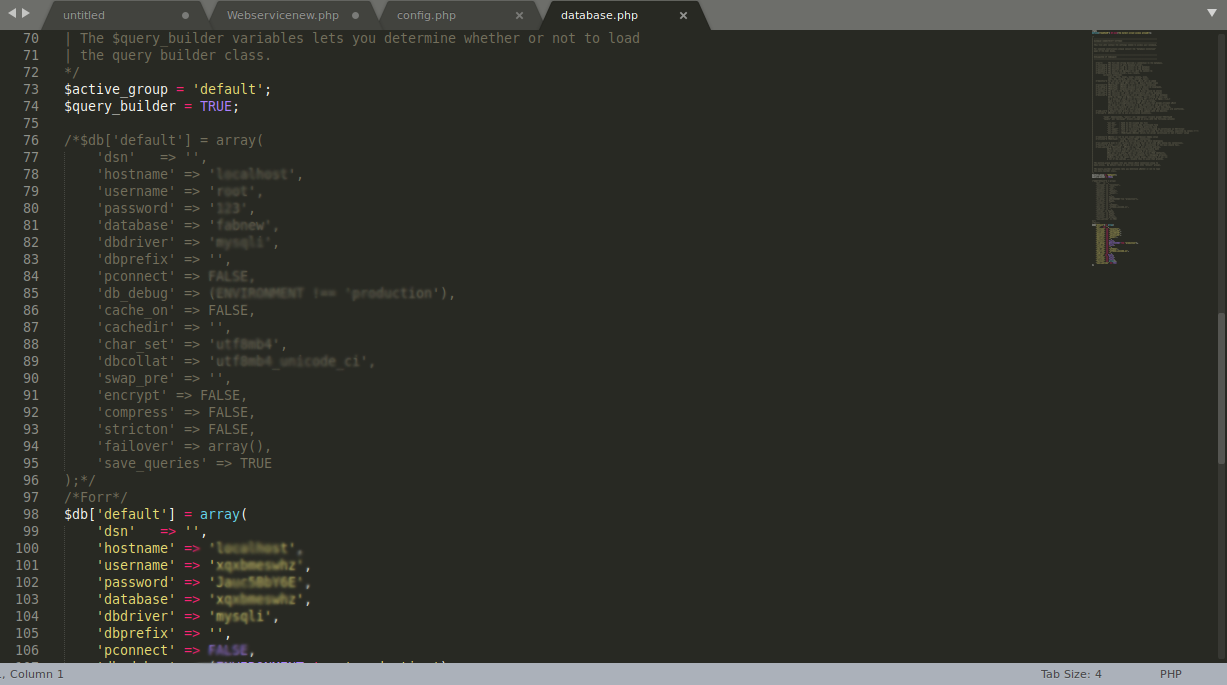
- • Setup your database settings:- application/config/database.php
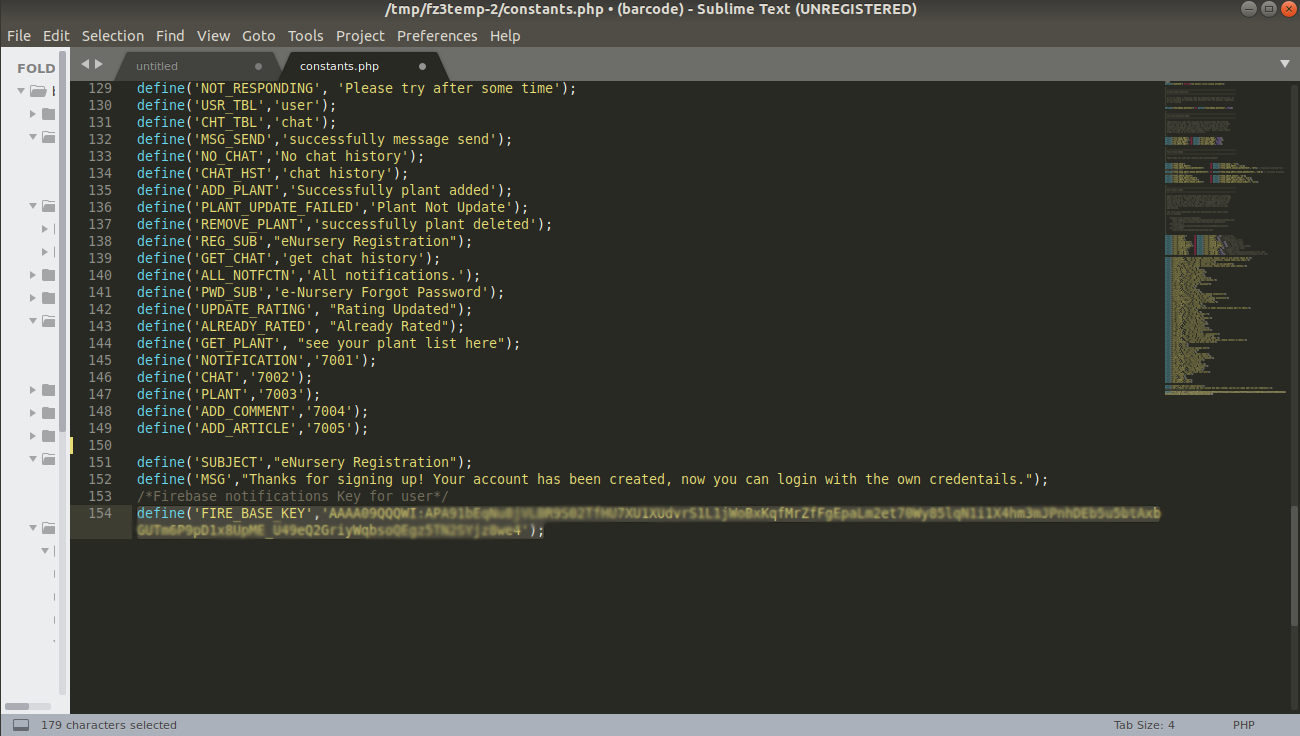
- • Setup your database settings:- application/config/constants.php
- 'hostname' => 'localhost',
'username' => 'root',
'password' => '',
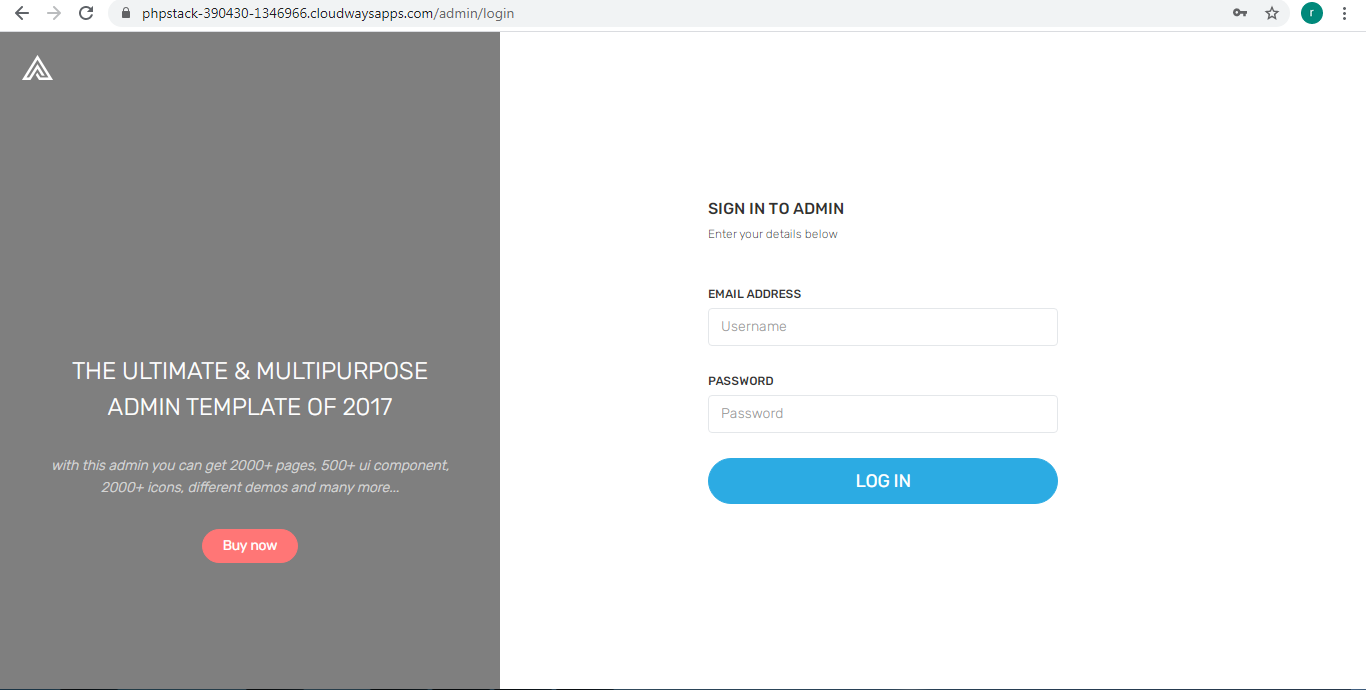
'database' => 'RealEstate', - Enter your host address to check the access web admin panel eg. http://domain.com/admin
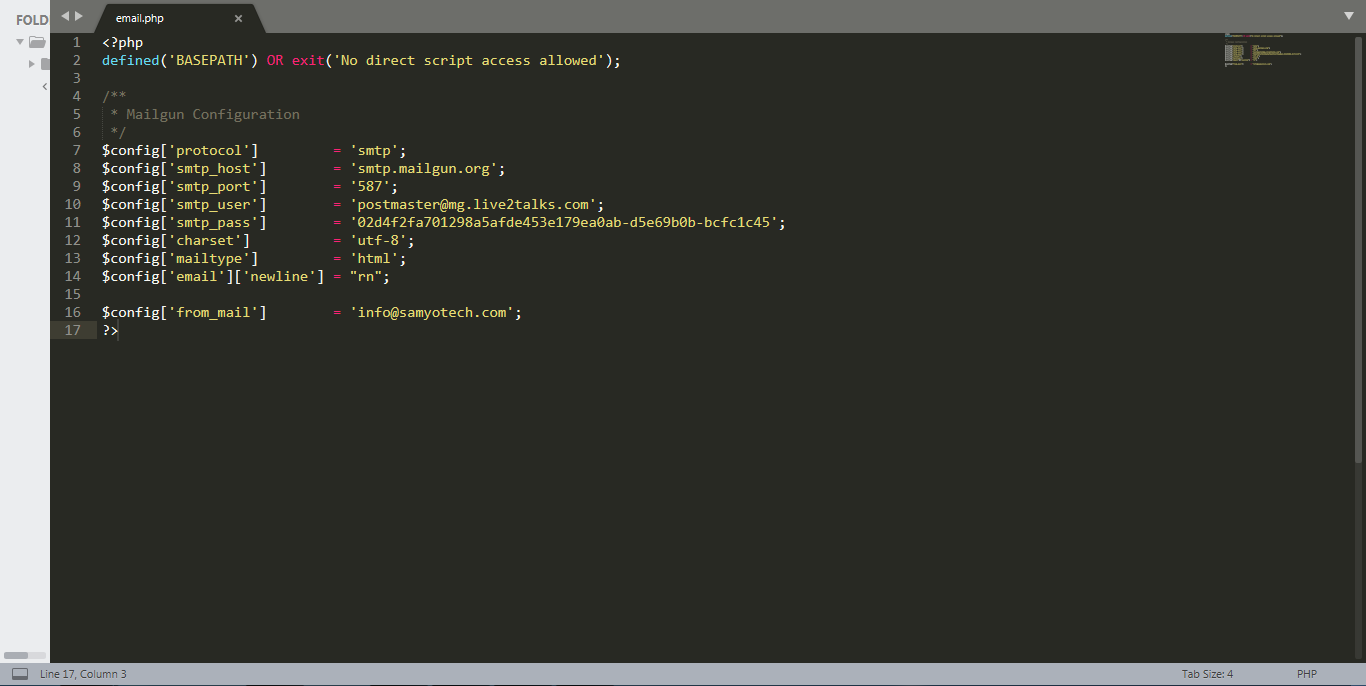
- • Setup your mailgun:- application/config/email.php
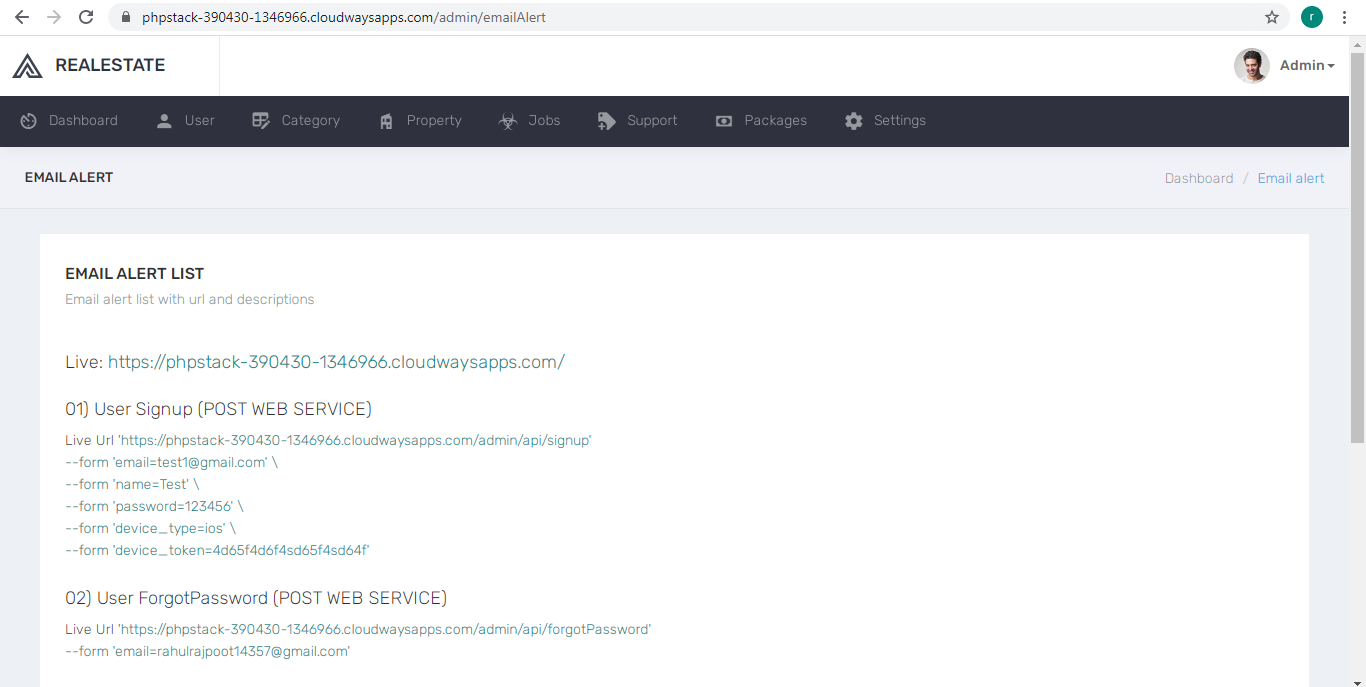
- • Use email for this place:- Admin pannel/Setting/Utils/Email alert
Change Third Party APIs
You need following API keys for third party libraries to work.
- Firebase Push Notification- This key will be used to generate Push Notification
- you need to create your project first Console Firebase Google
- You can find the API KEY in: (gear-next-to-project-name) > Project Settings > Cloud Messaging
Setup Firebase Push Notification
Follow instructions OR Video:
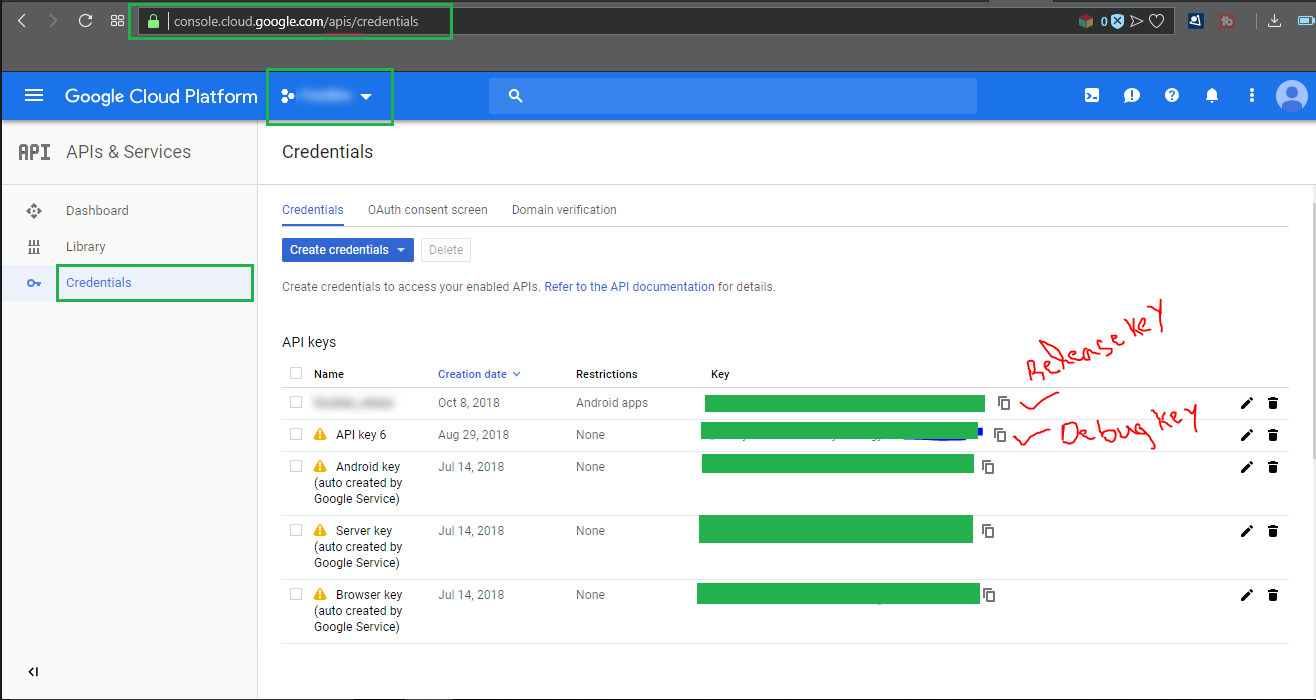
Server Key is the API key
Errors & Solutions Log
If you're facing 404 error in setup of admin panel, Please check that your server directory have .htaccess file in it.
If you're facing 500 error, Internal Server Error server error response code The HyperText Transfer Protocol(HTTP) 500 Internal Server Error server error response code indicates that the server encountered an unexpected condition that prevented it from fulfilling the request. ... Usually, this indicates the server cannot find a better 5xx error code to response.
Little explanation about the installation - if you paste installation of project in directory something like http://localhost/SHOP, you must set this directory to application/config/config.php - $config['base_url'] = 'http://localhost/SHOP'; and must remove from .htaccess file "RewriteBase /" line because css and js files will not be loaded! But you must know that the best way to install this platform is to set it in root http://localhost directory or if you want to be in other directory just set virtual host for this and point him to there. (example: http://shop.dev - point to localhost/shop directory). How to create virtual hosts you can read here: http://goo.gl/UvpYMG